
The article describes operation and first steps of the Univention Corporate Server (UCS) virtualization image. The image is provided in the zip format for VMware and in the OVA format for VirtualBox.
A sufficiently recent VMware Player (>= 5) or VirtualBox (>= 4.1.12) is recommended.
To start the image, a BIOS option for hardware virtualization has to be activated. Depending on the CPU Vendor, the option is called VT-x or AMD-V.
The image (Download) includes a completely installed and pre-configured UCS system, which can be configured for different system roles. The system offers more possibilities than the online demo system. It is a complete UCS system without access restrictions to test functionality and application.
Virtualization with UCS Virtual Machine Manager (UVMM) can not be tested with a virtualized UCS system. The installation of UCS on hardware is required for virtualization.
Operation
Starting the VirtualBox image
The UCS VirtualBox image can be downloaded in the OVA format from our download area.
The image can now be imported. Start VirtualBox and select the downloaded image after clicking on File → Import Appliance. When the import is finished the appliance can be started by clicking on the Start button.
Starting the VMware image
The UCS VMware image can be downloaded as zip archive from the download area. After extracting zip archive, the VMware image can be used in VMware Player (free download at http://www.vmware.com/download/player/).
After the installation of VMware Player, the UCS VMware image can be started on Linux with the following command:
$ vmplayer path to download/VMwareImageName.vmx
System boot
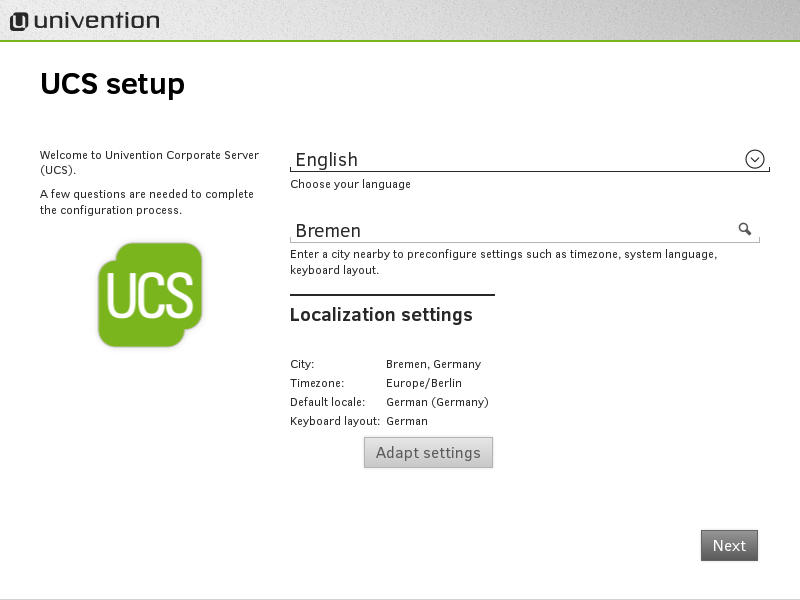
Upon start the boot menu appears. The default chosen entry Univention Corporate Server … will be started either with the return key or automatically after 5 seconds. After the first boot, UCS opens the wizard for the base settings.
Settings
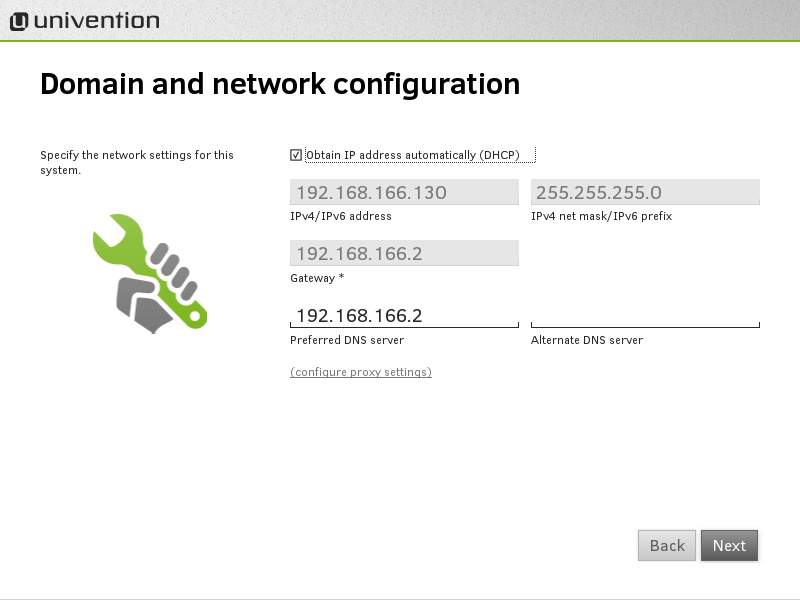
The network access in the image is set to “Bridged mode” in order to enable a network configuration for access to the test system from the local network. The UCS appliance wizard guides the user through the following steps of the initial configuration.
-
Domain and network configuration defines the network configuration for the system. You can leave the setting at “obtain IP address automatically (DHCP)”.
Click on Next.
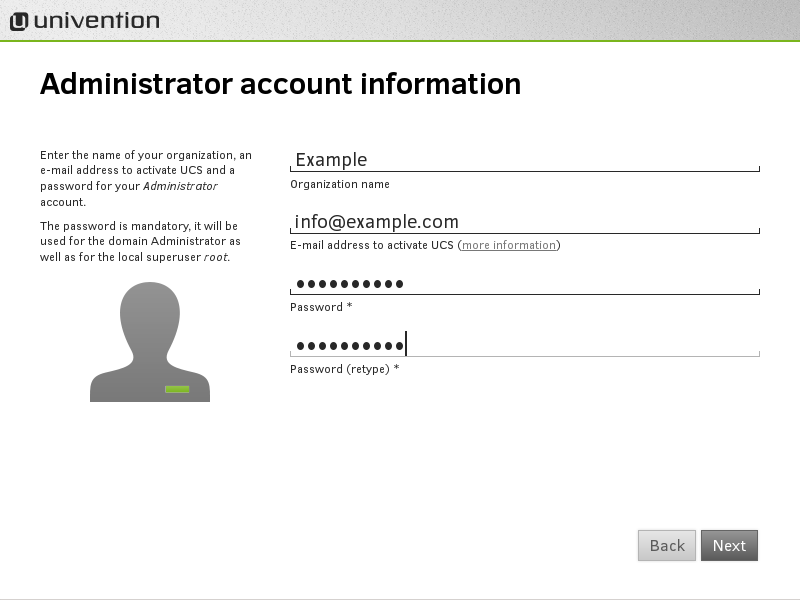
-
Domain setup for configuration of the UCS system role in the environment. If the system is the first UCS system in the environment, the setting has to be left at Create a new UCS domain.
More information about the domain setup can be found in the UCS manual.
Click on Next.

-
Administator account information for configuration of the Administrator account on the system. The password for the administrator account has to be provided here.
Click on Next.
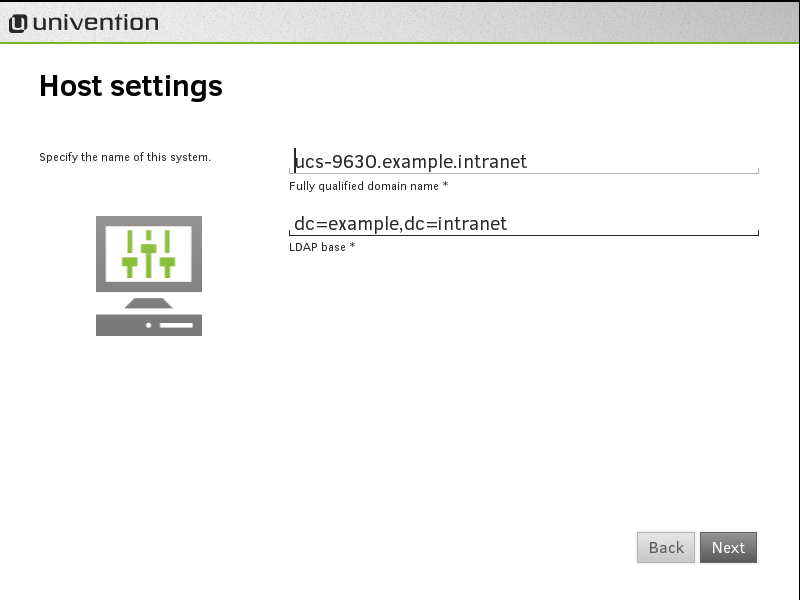
-
Host settings for configuration of fully qualified domain name (FQDN) and LDAP base. The fully qualified domain name is automatically suggested from the administrator account setting and can be customized.
Click on Next.
-
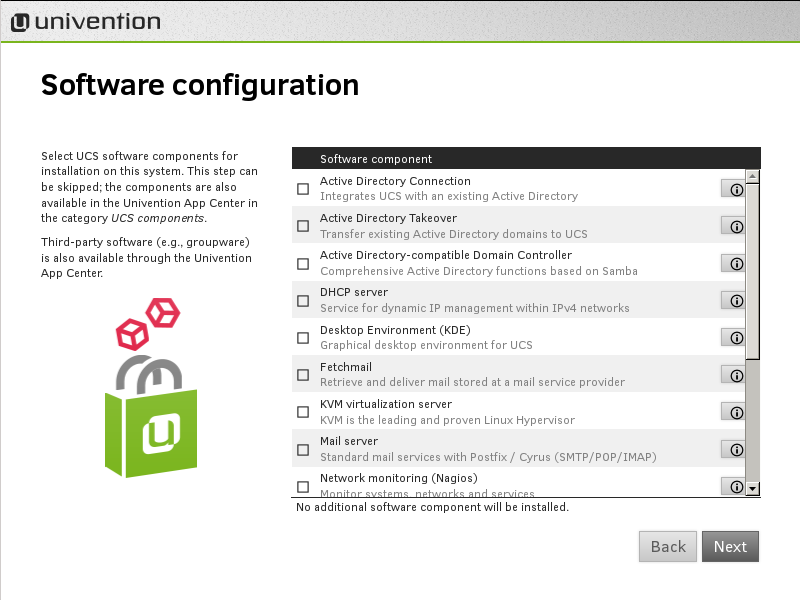
Software configuration for installation of additional software components. The settings can be left as is.
Depending on the test purpose additional software components may be chosen that will be installed after finishing the configuration. For example, the component Mail server.
Click on Next.
-
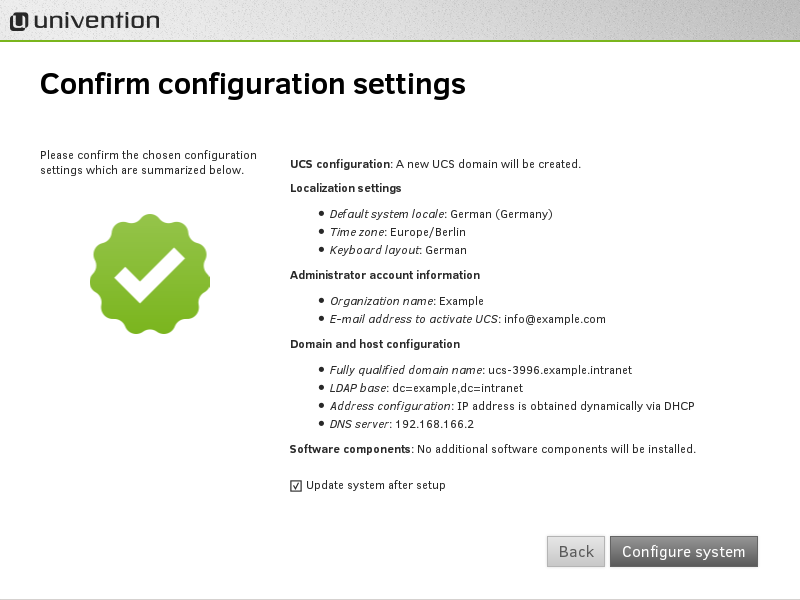
All necessary settings are made after the software settings and can be applied to the test system by clicking on Configure system.
-
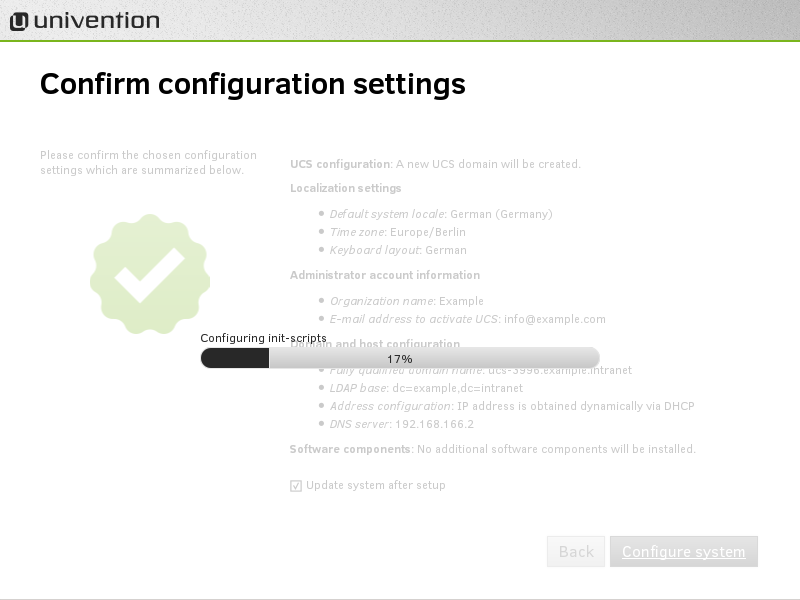
Finishing the configuration takes a moment. Hostname, LDAP base, Domain and network settings are configured, if necessary additional software will be installed and the system will join the domain.
-
Afterwards the system setup is finished and the system is ready for operation.

First steps in the UCS system
The system can be accessed with the already present accounts “root” and “Administrator” after the reboot. Both user accounts use the Root password that has been set during the base settings.
SSH Login
A SSH server is installed on the UCS system. The user “root” can login via SSH. With the SSH login the user has direct access to the system (e.g. univention-config-registry or view log files in /var/log/…).
UCS management system
The UCS management system can be accessed with a web browser through the configured IP address during the initial configuration. The URL is https://. For example, if the IP address 192.168.0.140 has been set, the URL would be https://192.168.0.140.
All settings in the scope of the domain can be configured in the domain management of the UCS management, e.g. management of users, groups, computers, configuration of services etc. The user account “Administrator” can be used for administration tasks. In principle, all users in the group “Domain Admins” are allowed to make changes in the domain management.
Graphical login
KDE is installed as desktop on the UCS system. It allows users to have a graphical login to the system. The user “root” is should not login to the desktop. To test the graphical environment without adding a new user, the user “Administrator” may be used.
Add further systems to the UCS environment
Windows client computers
Univention Corporate Server provides functionality known from Microsoft Windows server systeme to Windows client computers. The UCS systems includes an Active Directory compatible domain controller that allows the management of users, printers and shares that can be accessed from Microsoft Windows client computers. This requires the Microsoft Windows clients to be member of the domain. If the UCS system can be reached over the network from a Microsoft Windows client computer, the Windows client may join the domain just as if it joins a Windows domain.
This is documented in the UCS manual.
UCS systems
If additional UCS systems (servers or desktops) should be operated in the environment, they have to be instantiated seperately. It is possible to operate the UCS system repeatedly in different system roles. Detailed information about the installation can be found in the UCS Quickstart Guide and in the UCS manual.
Documentation
Univention Corporate Server differs from other Linux distributions among other things by its sophisticated management system. The UCS management system is well-rooted into several areas of the system. That is the reason why UCS includes concepts and mechanisms like domain management or Univention Configuration Registry for the administration of several UCS systems that are not available in other distributions. The UCS manual describes many of these features.
Announcements and discussion about Univention Corporate Server can be found in the Univention Forum. Feedback is welcome in the Forum.
Further information to start with Univention Corporate Server can found at the following entry points: